677 Messages
•
44.6K Points
WebsiteBuilder: Add a Blog
Blogging is one of those many ways you can reach out to your people and be where they are. If you're not familiar with a blog, simply put, its similar to an online journal or diary. It's a place both to convey your ideas and gather new ones at the same time. With a blog, you can share products, methods or simply get a conversation started about anything you would like. The goal is that people will interact with your content.
In this article, we will discuss the basics of "How to Add a Blog" to your Websitebuilder website. If you do not have content to add to your blog yet or need help getting started, we recommend reviewing the default articles that are present when creating a new blog for the first time.
Adding a Blog to your Websitebuilder website:
The first step towards creating a blog is to determine if the Template you chose already has one or not.
To do so, simply click the "Pages" tab from your left-hand menu in your main design dashboard and review the page list.
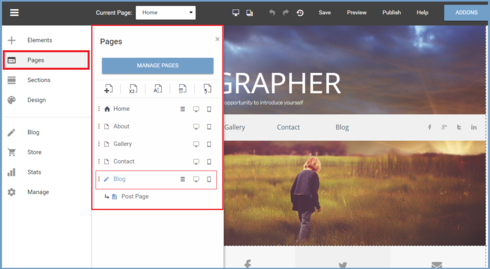
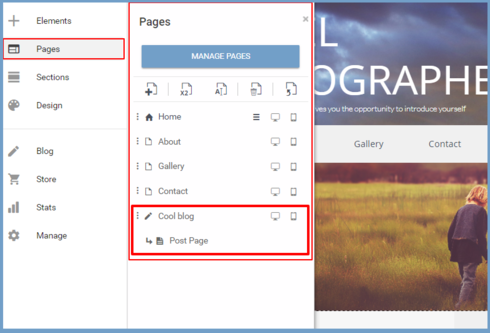
- If you do already have a blog, it will appear as a page titled "Blog." (If you have already renamed it, it may be different. Look for the sub page "post page too.)
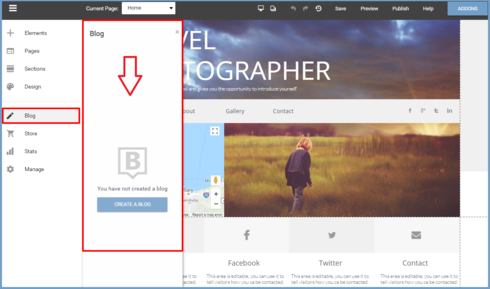
- If you do not already have a blog page, click the "Blog" Icon in your left-hand menu.
- A Menu will appear where you will have the option to click "Create Blog."
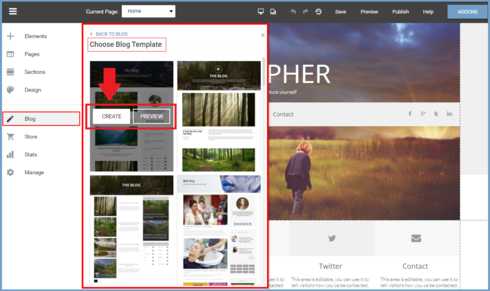
- Once you select "Create Blog" a menu will appear where you can select the blog template.
- Browse through these and select the template that best fits how you want your blog to look.
- Select "Preview" to see how it looks online and select "Create" to move forward.
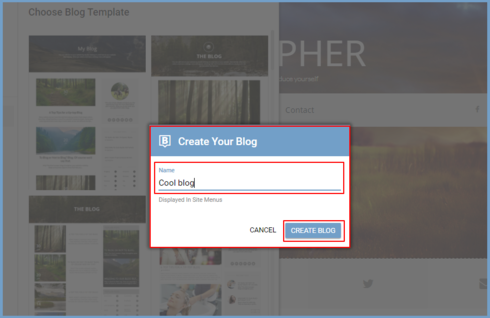
- Next, you will need to name your blog something cool and memorable.
- Your blog should now be available from the pages section as well as the post page.


lisa8964
4 Messages
•
170 Points
6 years ago
3